Deploy The Blue Car Application
You will start by deploying the example application which allows a customer to order medical assistance based on selecting a map location. The application consists of a public AWS API gateway which connects to a serverless application layer AWS Lambda, which uses Amazon DynamoDB .
You will also deploy AWS Amplify to host the static website with CI/CD build-in and Amazon Cognito to manage users.
Our deployed architecture should reflect the following diagram:
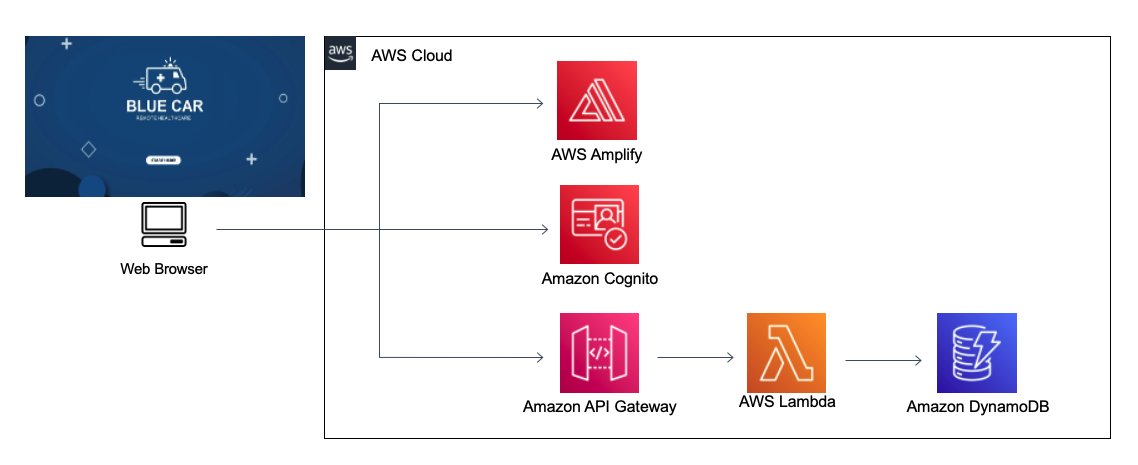
Note the following:
AWS Amplify hosts static web resources including HTML, CSS, JavaScript, and image files which are loaded in the user’s browser.
Amazon Cognito provides user management and authentication functions to secure the backend API.
Amazon DynamoDB provides a persistence layer where data can be stored by the API’s Lambda function.
JavaScript executed in the browser sends and receives data from a public backend API built using Lambda and API Gateway.
To deploy the template for the base infrastructure complete the following steps:
1.1. Application Deployment using Cloud9 as the IDE.
For our application deployment, we will use AWS Cloud9 as our IDE, where our prebuilt script will be automatically cloned.
You can get the CloudFormation template here.
Console:
If you need detailed instructions on how to deploy CloudFormation stacks from within the console, please follow this guide.
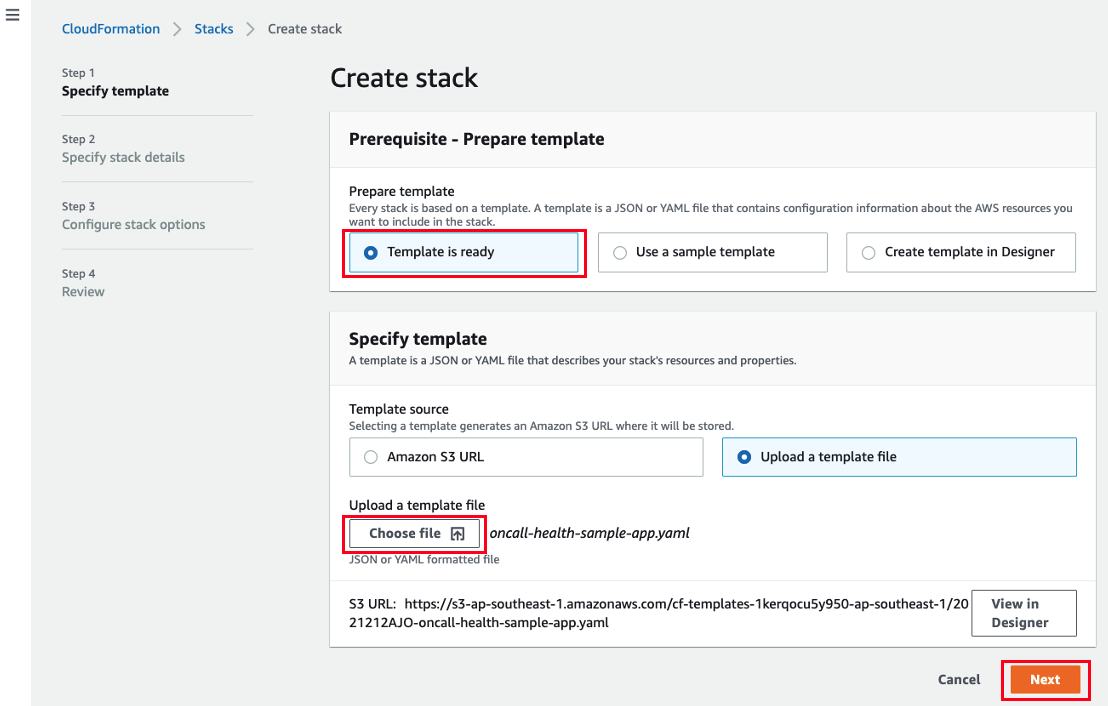
- Sign in to the AWS Management Console and open the CloudFormation console at https://console.aws.amazon.com/cloudformation.
- Select the stack template which you downloaded earlier, and create a stack:
For the stack name use cloud9-stack and click the Next button.
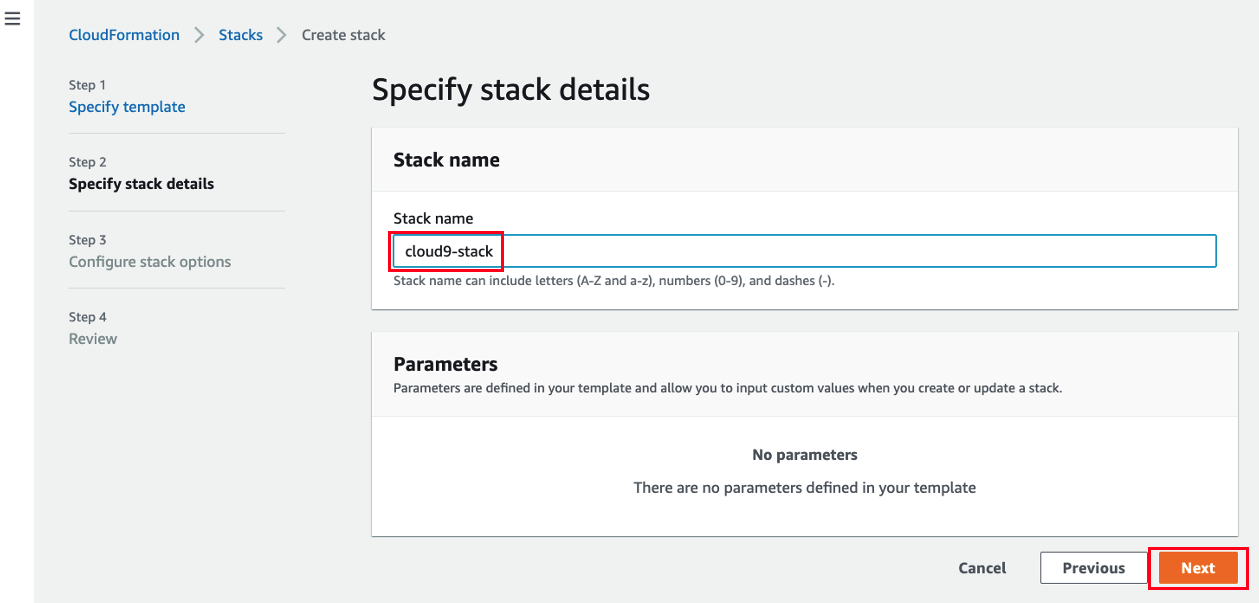
Click Next button.
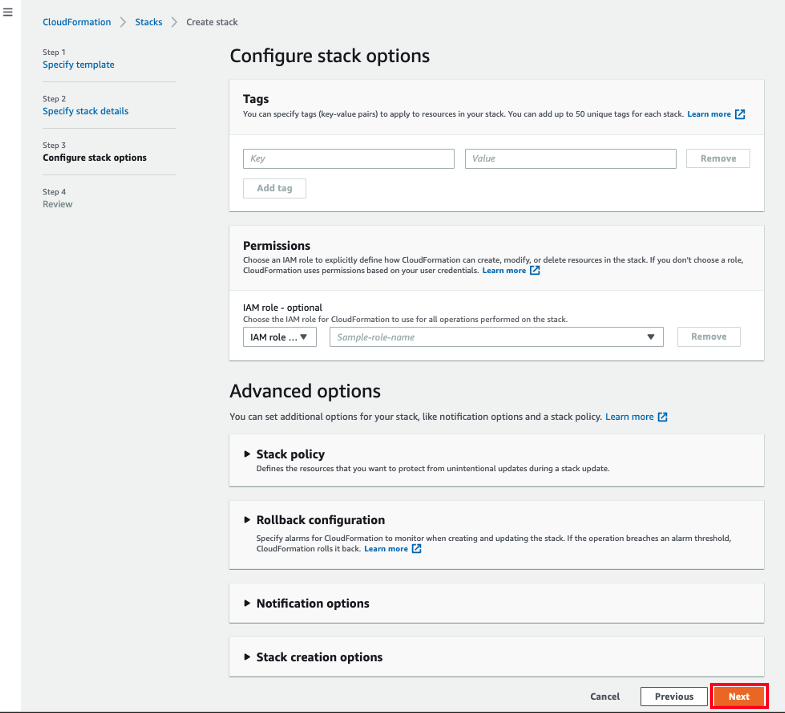
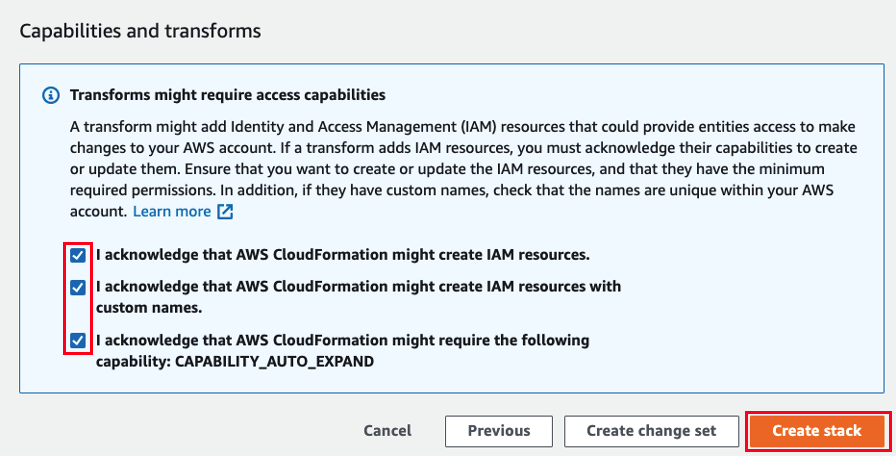
Scroll down to the bottom of the stack creation page and acknowledge the IAM resources creation by selecting all the check boxes. Then launch the stack. It may take 4-5 minutes to complete this deployment.
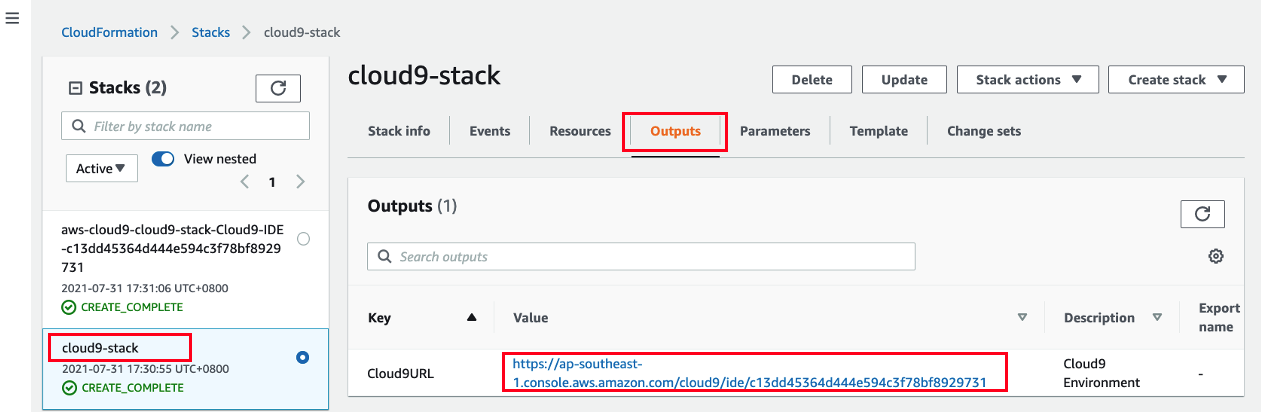
Click cloud9-stack and go to the Outputs section of the CloudFormation stack. Then, click Cloud9URL to set up your IDE environment.
1.2. Deploy The Blue Car Application.
- Launch Cloud9 from the AWS Console. The repository where all of the CloudFormation templates are stored will be automatically cloned. Go to aws-well-architected-labs/static/wapartners/100_Automating_Serverless_Best_Practices_with_Dashbird/Code/oncall-health-sample-app directory path and run bash build_script.sh. It may take 20-25 minutes to complete this deployment.
cd aws-well-architected-labs/static/wapartners/100_Automating_Serverless_Best_Practices_with_Dashbird/Code/oncall-health-sample-app
bash build_script.sh

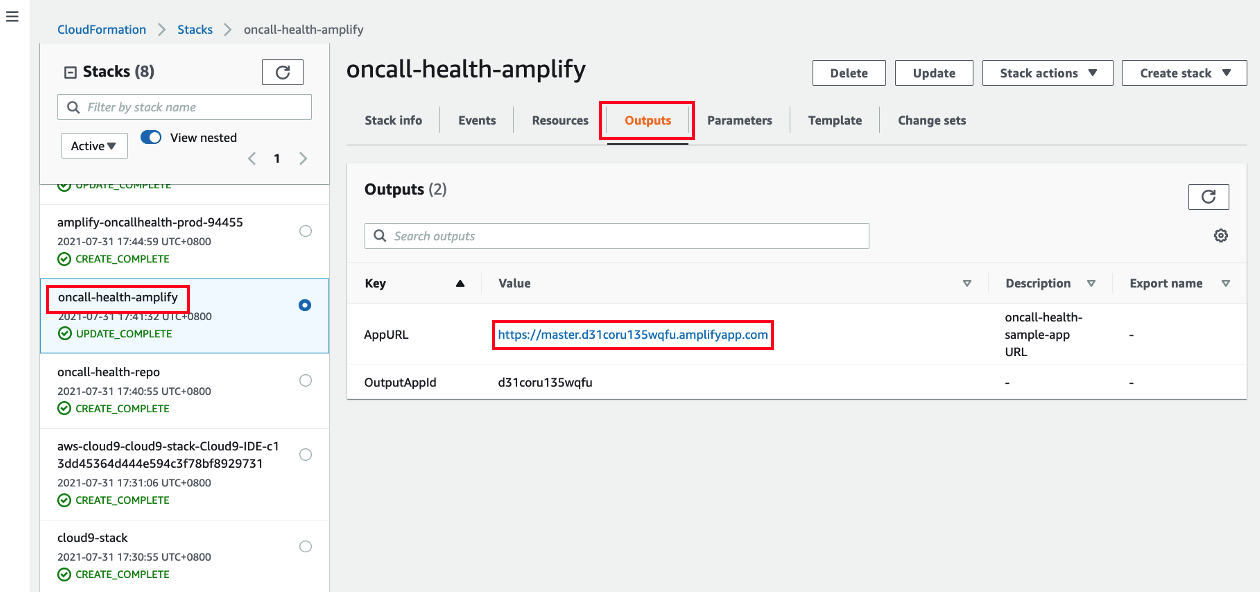
- In the CloudFormation console, you will see a new stack called oncall-health-amplify. Click oncall-health-amplify and go to the Outputs section of the CloudFormation stack. Then, click AppURL to access the application.
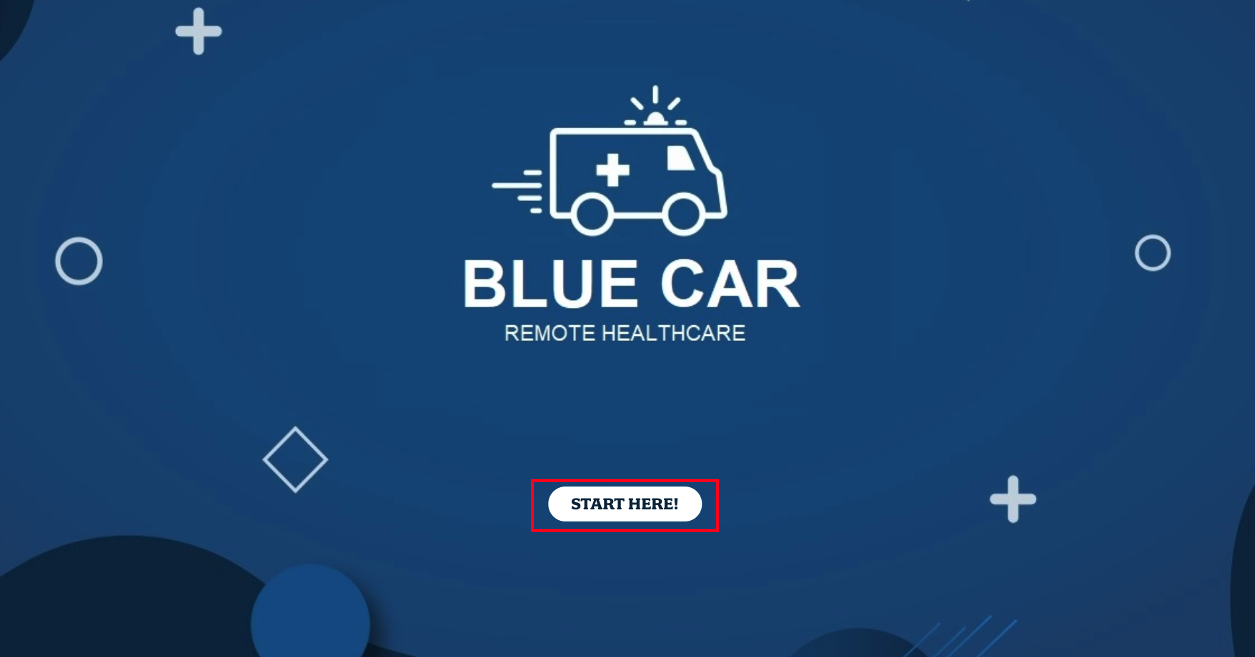
- You should see the Blue Car application landing page as show below, then click START HERE.
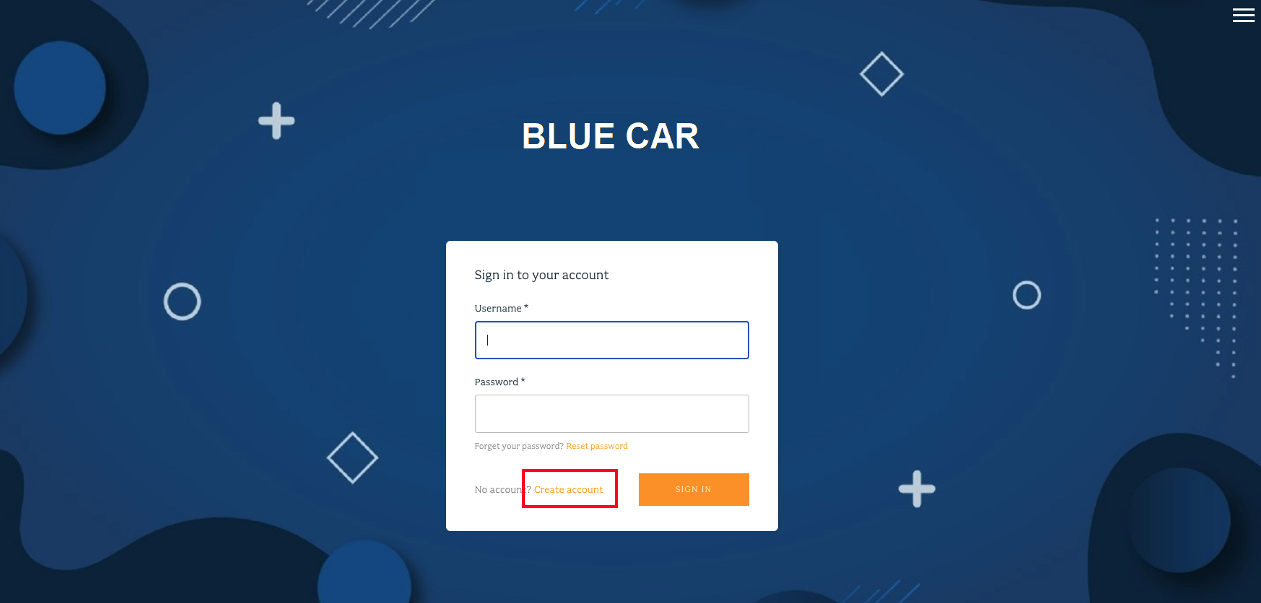
- Click Create account to create a new user.
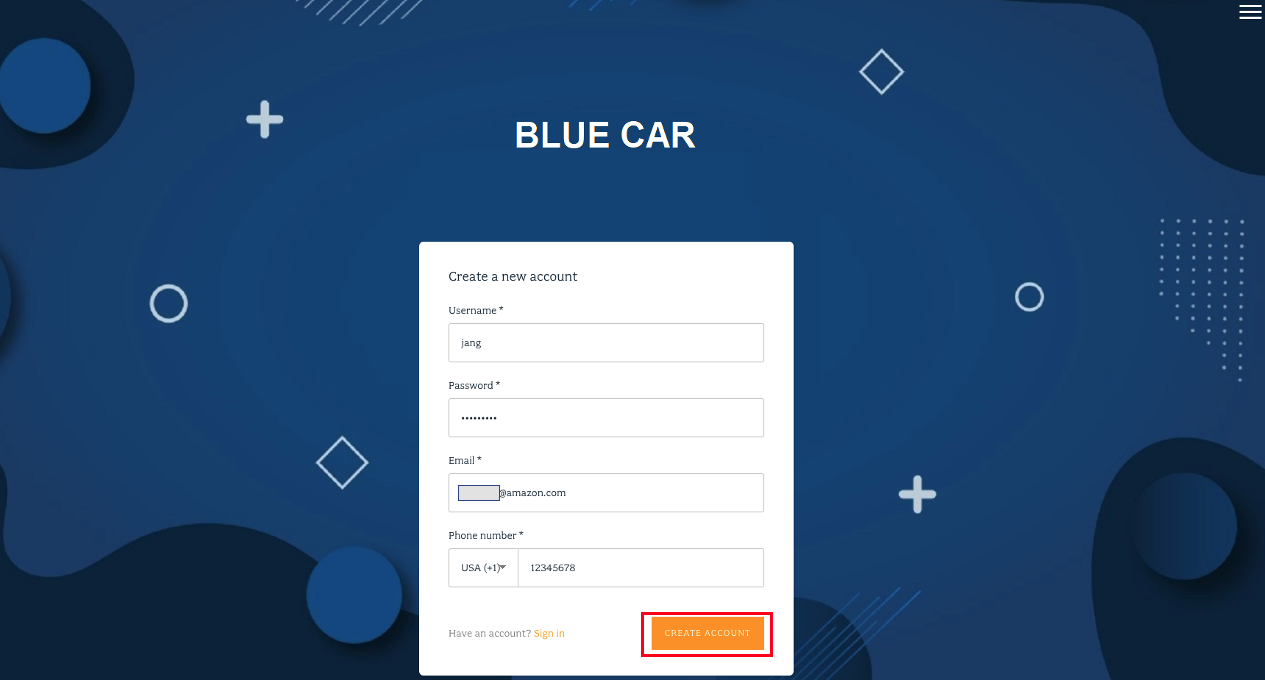
- Provide a Username, Password, Email, and Phone number, then click CREATE ACCOUNT
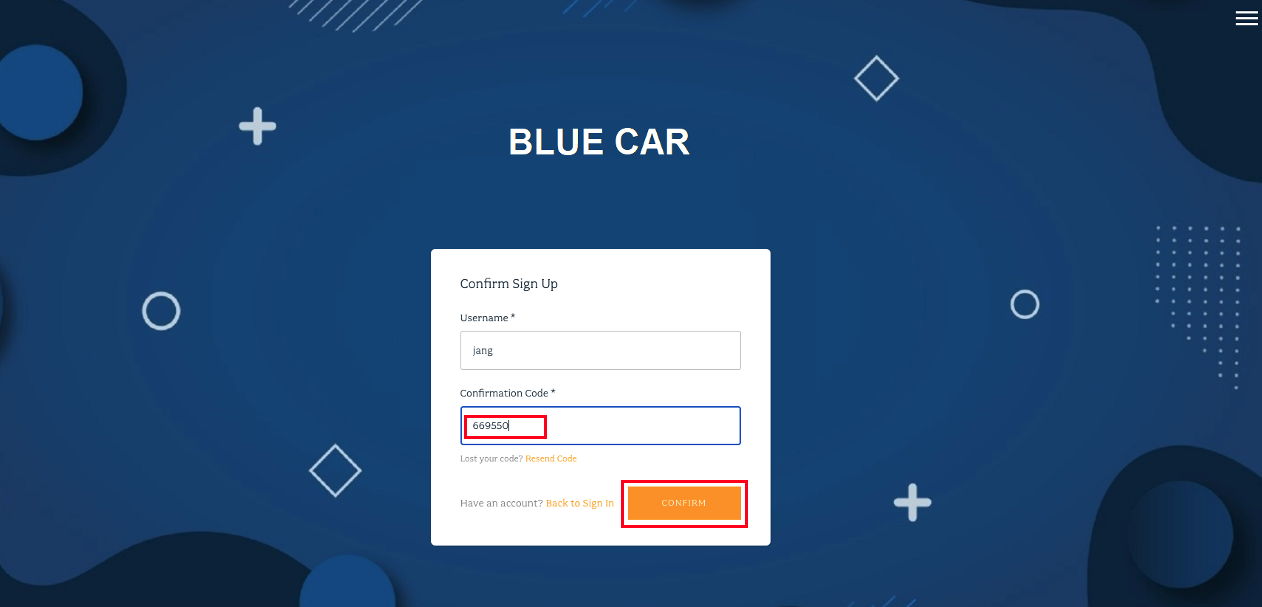
- Retrieve the Confirmation code from your email which you entered previously and click CONFIRM. This step is required because only verified user can call blue car in the application.
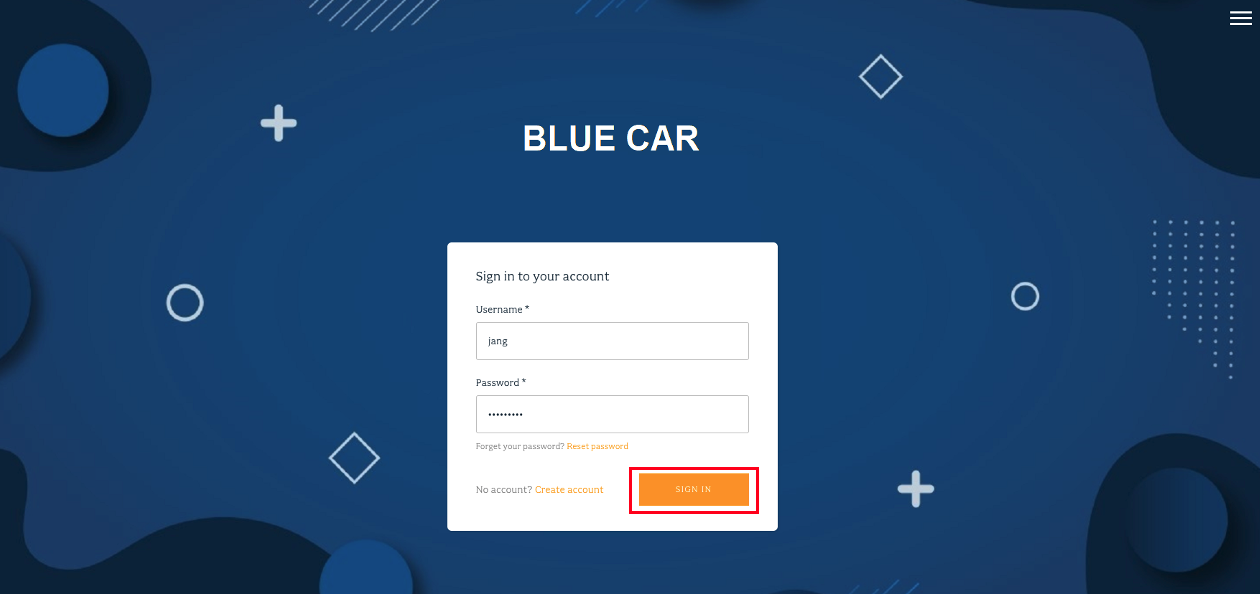
- You should now be able to log into Blue Car Application.
- The application will default to a map of Melbourne as shown.
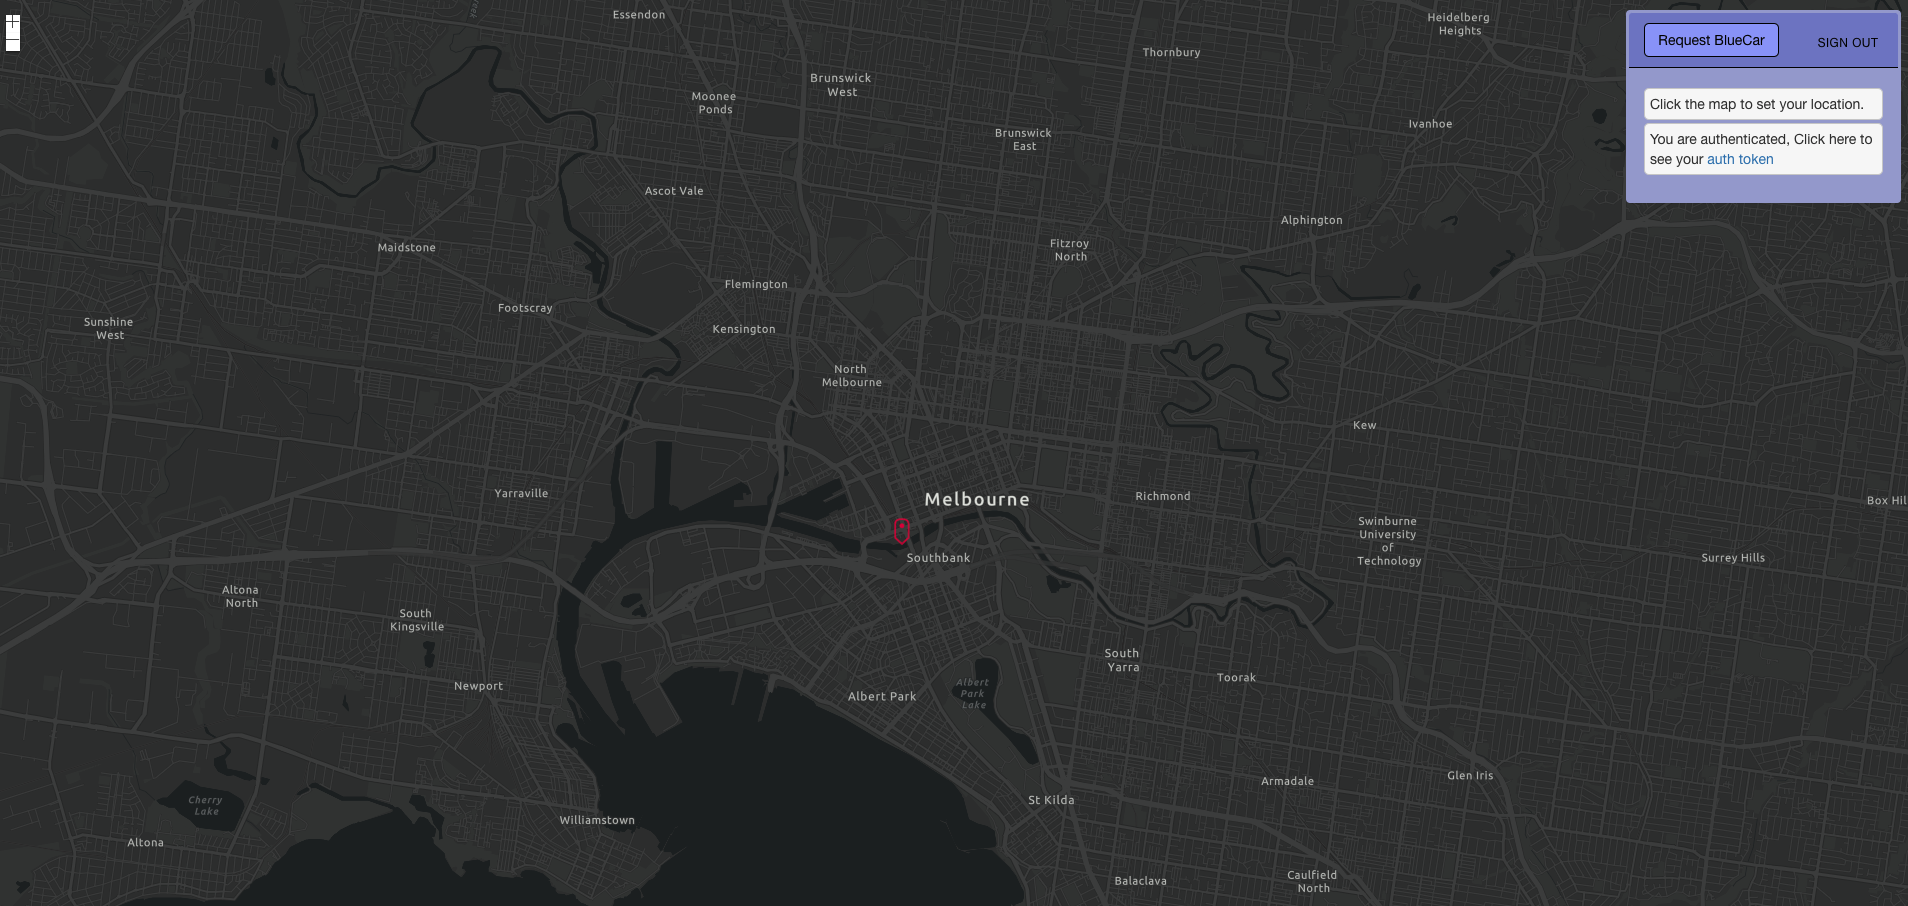
- Click a location on the map and click the Set Pickup button to request a blue ambulance car.

END OF SECTION 1